How to Have Artificial Turf Installed

Playrite installs artificial turf in Knoxville and East Tennessee. Installation starts with a consultation about your space and intended use, followed by site preparation, a stable base with suitable drainage, turf layout, seams, trimming, infill where required, and perimeter securing.

The installation plan depends on whether the space will be used for a putting green, lawn, pet area, playground, or sports field. Turf selection, base preparation, drainage, and cushioning should match the application.

What affects installation cost and timing? Project size, access, existing surface conditions, excavation, drainage work, turf selection, and custom features affect the scope. A site review is needed before an accurate price or schedule can be provided. Request an installation quote and tell us your location, approximate area, intended use, and desired timing.

The steps below explain Playrite鈥檚 outdoor installation process. Indoor spaces and specialized applications may require a different base or installation approach.

More installation and ownership questions: How much does artificial grass cost? 路 Does synthetic turf get hot? 路 Is artificial turf safe for pets? 路 How long will it take to install my artificial grass? 路 How long does synthetic turf last? 路 How do you clean artificial grass? 路 Does my turf installation come with a warranty? 路 What kind of turf maintenance is required?
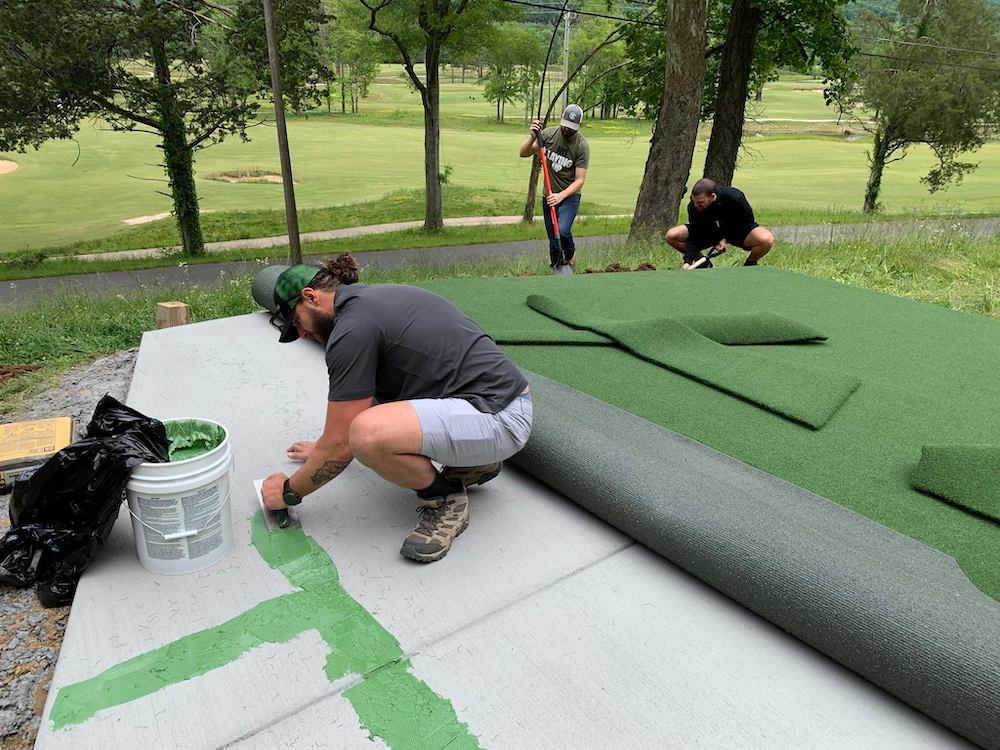
Playrite team members installing artificial turf

Our Artificial Grass Installation Process

Step 1: Consultation & Design

Our team will meet with you in order to fully understand the vision for your space. Following our discussion, we will recommend a solution and design accordingly.

Step 2: Excavation + Haul Off

First, we prepare the sub-base to allow for proper stability and drainage. This phase utilizes specialized equipment and is highly labor intensive.

Step 3: Plastic Lumber Installation

We add 50-year warrantied plastic lumber around the perimeter of your space to establish the final grade and prepare a surface to which we will secure the turf.

Step 4: Add Geotextile

The addition of geotextile is critical for keeping the rock separated from the dirt. It also provides additional stability and prevents weeds from growing.

Step 5: Install Aggregate/Rock

The installation of the aggregate and base rock provides a solid foundation for the turf and allows for superior drainage.

Step 6: Complete the Turf Layout

The artistic phase of your project requires laying out the turf in the most efficient way possible without compromising aesthetics.

Step 7: Seam Taping & Gluing

Because the artificial turf comes in sections, we connect them with tape and glue to create a seamless, beautiful space.

Step 8: Turf Trimming

In this finishing phase, the excess synthetic turf is trimmed to the pre-determined areas.

Step 9: Infilling

The final step of the finishing process is to infill the turf with a coated sand that provides ballast, or the ability to prevent expansion and contraction. Infill is also important for protecting the turf fibers and keeping them upright.

Step 10: Securing the Turf

The final step for your project is to expertly secure the artificial turf around the perimeter to the nailer board. We use a combination of narrow, crown staples and/or screws to prevent tripping hazards.

Artificial Grass Installation Benefits

No Mowing

No Irrigation

No Over-Seeding

No Chemicals

No Mud

No Dead Spots

No Grass Clippings

Low Maintenance